
Think of exposure as the amount of light that your camera uses to produce a photo. The entirety of this book is devoted to trying to control exposure by changing how your camera lets light in.
Sometimes you just have to make do with what light you have. Without knowing anything about manual controls, you can still move around and move your subject. Knowing manual controls gives you many more options and flexibility.
For our purposes, the complicated math formula behind this can be reduced to:
- More light == brighter photo
- Less light == darker photo
How does a camera automatically determine the proper exposure?
When turned on and pointed at a subject, your camera is taking in light. It then calculates how much light is needed to keep the subject (or the entire scene) from being too dark or too bright.
Try this.
1: Point your digital camera at a dark place, like a corner or under the table.
2: Then point it quickly at a bright scene, like out the window. The camera’s LCD should turn almost completely white.
The following photo is taken from inside of Federal Hall on Wall Street, right after I had pointed it toward a dark corner:
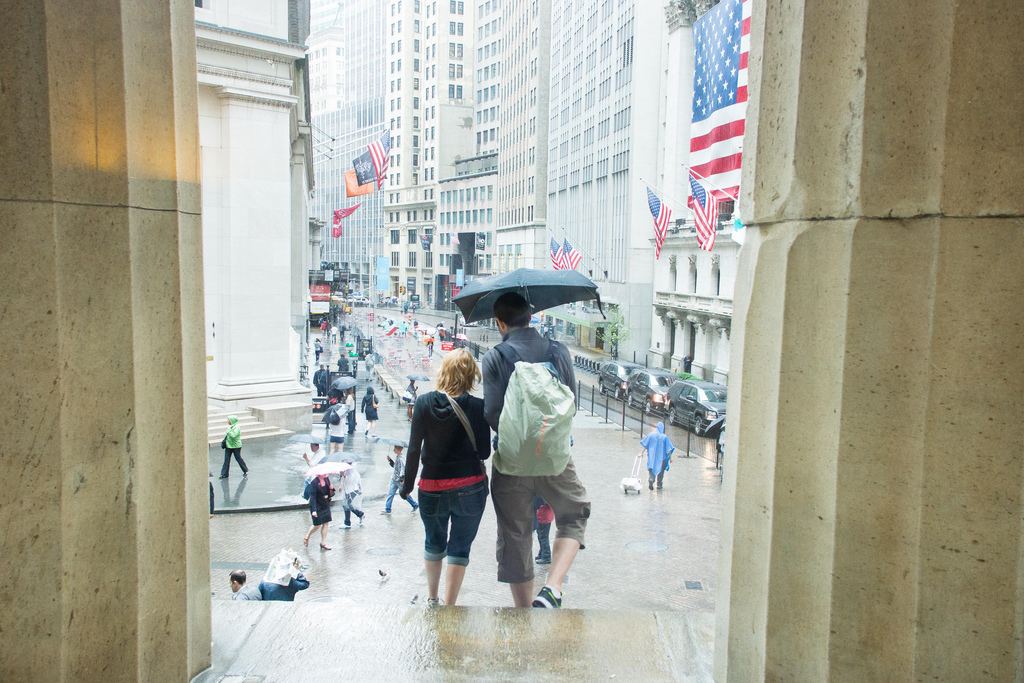
3: After a second or two, the LCD screen should darken a bit overall, revealing more detail in the scene:
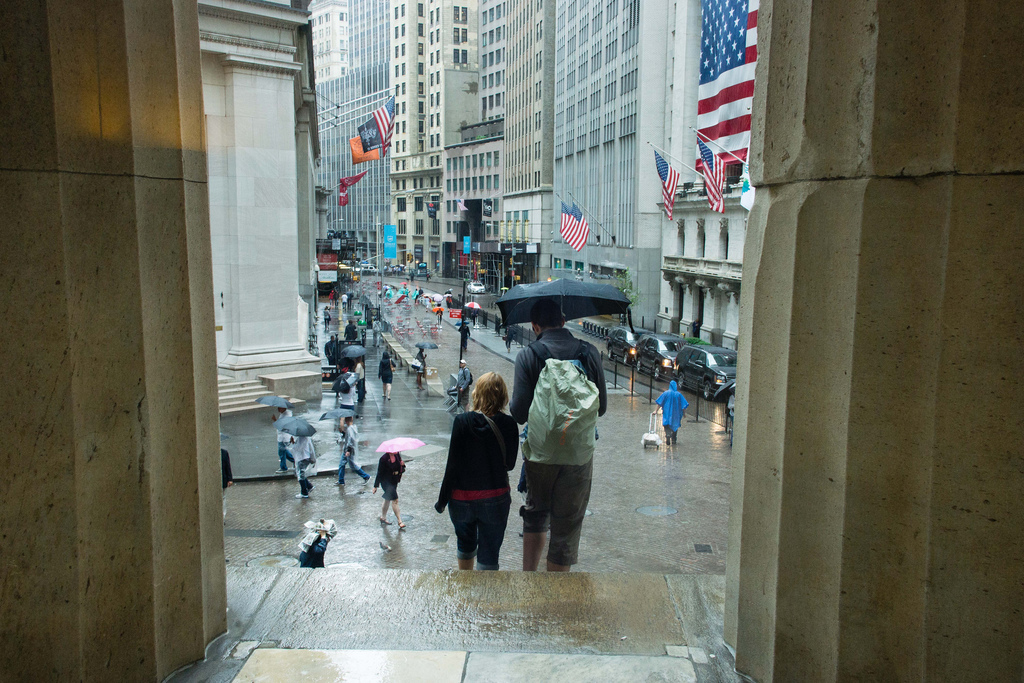
This delay in the display is caused by the lag in calculating the correct exposure. Your camera’s computer is jumping into action, trying to figure out how the right amount of light to let in so that the subject can be seen.

How does the camera know what the “subject” is?
By default, most cameras assume that it’s what the center is. In simple point and shoots, you can’t change this. In modern phone cameras, you have some flexibility in choosing the spot to expose, which I cover in the next chapter.
What’s wrong with properly exposing the subject?
It’s not about right or wrong; it’s about what visual effect you intend to show.
In the last chapter, we learned how the sun behind the subject creates a silhouette. When a camera is in auto-exposure mode, it will calculate how much light is needed to make your subject not a silhouette.
As the subject gets brighter, so does the rest of the background. This is what is called, “blowing out the background.”
In the photo below, I deliberately reduced the exposure to use one-fourth the light compared to the camera’s default exposure. The model is almost completely a shadow. Had I let the camera do the exposure, the details in the model’s clothing could probably be seen, but the entire sky would likely be white, i.e. blown out.
In other words, the “well-exposed” photo is not always the best photo.
The camera generally does a great job when the light is right.
But under extreme conditions, such as bright sunlight on a snowfield. Or a dark room. Or for if a ray of light happens to shine directly into the region (generally, the center point) where the camera makes its judgment, the camera may do something you don’t want.
This is why we want to take control of exposure for ourselves.


